Middle Eastern Pita bread. A classic versatile flatbread

by Middle Eats
Middle Eastern Pita bread A classic versatile flatbread

Pita bread (versatile flatbread) is on the menu in Book recipe, and we are going to teach you how to make this delicious recipe from scratch!

Here’s how I like to make Arabian-style pitta (pita) bread. These differ from the Greek ones in shape, thickness, and texture. They’re a very versatile bread that can be used for sandwiches or dipping and the recipe is deceptively easy.

  • Middle Eastern Pita bread A classic versatile flatbread
  • Middle Eastern Pita bread A classic versatile flatbread

Follow along with the 📝 recipes below👇🏾👇🏾
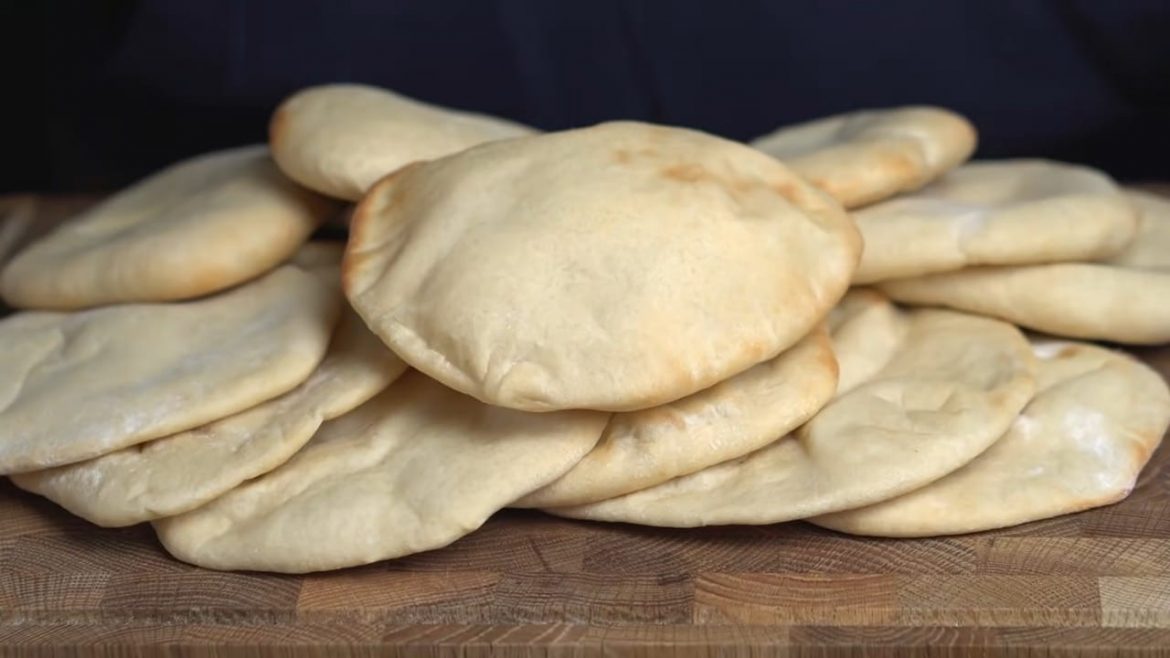
Middle Eastern Pita bread A classic versatile flatbread
Pin Print

Pita bread (versatile flatbread)

Rating: 5.0/5
( 1 voted )
Serves: 6 Prep Time: Cooking Time: Nutrition facts: 200 calories 20 grams fat

Ingredients

Ingredients (makes 6 80g Pittas or see below for other sizes):

  • 300g (10.6 oz)AP flour
  • 85g (3 oz) Milk whole or part-skim
  • 85g (3 oz) Water
  • 20g (0.7 oz) Olive oil
  • 13g (0.45 oz) Sugar
  • 8.5g (0.3 oz) Salt
  • 7.5g (0.26 oz) Active or Dry yeast or 18-19g (0.63-0.67 oz) Fresh Yeast

Recommended sizes:

  • 7-inch pitta - 80g balls - recipe yields 6
  • 6-inch pitta - 70g balls - recipe yields 7
  • 5-inch pitta - 60g balls - recipe yields 8
  • 4-inch pitta - 45g balls - recipe yields 10

Instructions

  1. Add the water and milk to a jug and check the temperature. If it's cold warm it up to room temperature and no hotter
  2. Add the sugar and yeast to the milk and stir to combine. Allow sitting for 10-15 minutes to bloom
  3. After 10-15 minutes check if the yeast has activated and a frothy layer exists, if not your yeast is dead and the dough will not rise
  4. Add the flour and salt to your mixing bowl, and mix briefly to combine
  5. Make a well in the center and add the yeast mixture and the oil. Use the dough hook attachment on your stand mixer or your hands to combine the yeast and flour together into a shaggy dough ball
  6. Knead on low speed for 8-10 minutes with the mixer or 12-15 by hand until the dough ball is smooth and soft. It should be only a tiny bit sticky to the hand
  7. Oil a bowl lightly then add your dough to the bowl, ensuring there is space for it to double in size. Cover with plastic wrap or a kitchen towel and allow it to rise for 1 hour
  8. After one hour flour your worktop and place the risen dough on it. Knock out the air and cut into the desired number of pieces
  9. Weigh your pieces to ensure they are all equally sized, then roll the dough into balls. Keep them covered until needed
  10. Flour your worktop then flatten a dough ball on it. Use a rolling pin to roll the dough out to the correct size in one direction. Turn it 90 degrees and roll the other way
  11. Allow your dough to rise for between 15-30 minutes before cooking

To cook Pitta in the oven:

  1. Preheat your oven to its hottest temperature with a fan
  2. Place a pizza stone or steel in the middle of your oven, or use an oven tray by placing it upside down. Allow the oven to preheat fully with the tray inside
  3. Once heated, toss on a rolled-out pitta. I prefer doing 1 at a time but you can do multiple if you want to speed things up
  4. Cook until it puffs up, and a brown ring forms around the edge. In my oven at 240°C, this took 3 minutes and a half. I would recommend testing a single pitta first to figure out your exact timing on the temperature you use.
  5. Remove the pitta once browned and immediately place it on a tray or plate. Cover with a kitchen towel and allow to rest before serving

To cook in the pan:

  1. Preheat a heavy-bottomed pan over high heat
  2. Add a rolled out pitta to the pan, allowing it to cook for 30-45 seconds
  3. Every 30-45 seconds flip the pitta over until it inflates and browns on the outside
  4. Remove and allow it to rest

Notes

  1. If you are working with more than 12 pieces of dough, I do not recommend rolling them all out at once. After they have sat and risen for more than 40 minutes without cooking they will over-proof and you'll have to re-roll them and wait for them to rise again otherwise they will fail to inflate. Work in batches while the rest are cooking.

  2. These will stay good for 3-4 days in an airtight container and they freeze great

Chapters
0:00 Intro
0:50 Preparing the ingredients
2:40 Making the dough
5:08 Forming the pittas
7:04 Pitta cooking techniques
8:57 Taste test and Review

Recipe video


Enjoy

Let us know what you think of today’s Pita bread (versatile flatbread) tips, tricks, and hacks!

Related Posts

Leave a Reply

[script_17]
Delightful Mother’s Day Bites: Crostini with Balsamic Strawberries and Ricotta TRIPLE GINGERBREAD BUNDT CAKE Taro Cake Recipes STUFFED ZUCCHINI BLOSSOMS How to Make DATE SPICE CHOCOLATE CAKE