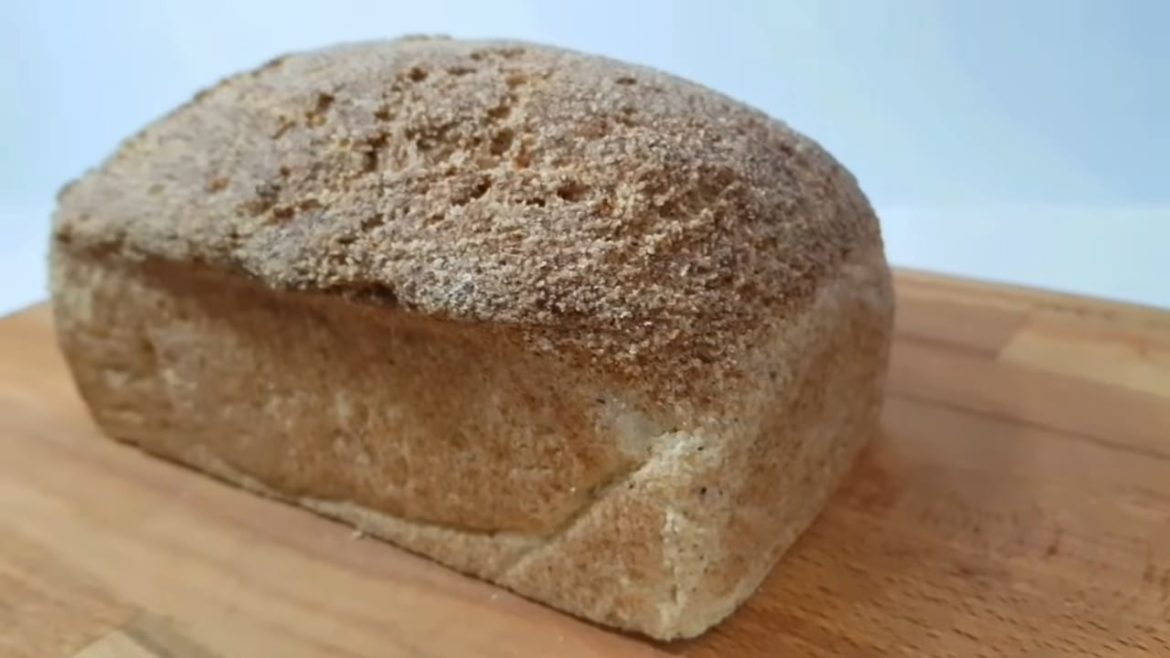
keto yeast bread grain-free, wheat-free, gluten-free & sugar-free!
This is my first attempt at making keto yeast bread and I am so glad that it turned out well after lots of research and experiments.
Frankly, keto yeast bread can never be as light and fluffy as regular yeast bread due to its heavy, moist ingredients and no gluten. But we can still get a relatively tall loaf with softer crumbs, crispier crust, and a nice yeasty flavor.
This recipe is the same with the non-vegan almond bread recipe here and I tried not to add any other ingredients besides the yeast. I will experiment with more yeast bread using other low carb flours and vegan versions as well so stay tuned.
Yeast is a living organism and almost all recipes call for some sugar to feed the yeast. But this is actually not necessary as the yeast can feed on any sugar from the ingredients of the bread. A pinch of sugar will make the yeast bubble up but this is just proving that the yeast is still active and good for usage.
The other notion is that salt kills the yeast. If you put salt directly over the yeast and leave it there for a few minutes then it will really kill the yeast. But if you mix them immediately, there’s no problem. In this recipe, we are dissolving the salt in the water so, with the proportional concentration, there’s no damage to the yeast.
Here are the relevant points that I have learned
- Do not use more yeast to gain more rise on the dough. The bread tastes weird with too much yeast.
- Use a smaller pan than usual. The reason is that if the pan is much bigger than the dough, after proofing the dough will expand to fill up all the empty spaces and you will end up with a big but flat looking bread. If the pan is smaller, the dough will rise upwards and way above the pan so it will look taller and also have nice curved edges at the top of the bread. For this recipe, I used a normal cake tin measuring 7″ length x 3.5″ depth x 2″ height.
- After going through more than 10 loaves, I realized that each and every loaf looks different and I just can’t get back a certain look that I like. The reason is that we cannot control how the yeast ferments and it also depends on the amount of dough and pan size we use. Hence, I have learned to embrace the differences. The most important thing is that the taste is the same.
- There are 2 ways to make a proof box at home. You can use the oven method shown here which I prefer as I can proof a few doughs at the same time or use a microwave. Heat 2 cups of water in the microwave until very hot or boiling. Turn off heat and push the cup to the back of the microwave. Place the dough covered loosely with a towel at the front. Close the door and proof for 1 hour.
- Covering the dough loosely with a towel is to prevent the dough from drying out and forming a skin.
- Weigh ingredients for accuracy.
- You can re-heat this bread by steaming or toasting.

Ingredients
Dry Ingredients
Wet Ingredients
Instructions
This helps to let the dough to continue to rise with the warmth and the steam from the water helps to make the bread crusty with softer crumbs.
NUTRITION FACTS:
- Total servings = 16
- Per serving;
- Net carb = 3 g
- Calories = 126
- Total fat = 9.3 g
- Protein = 5.6 g
See as well:

