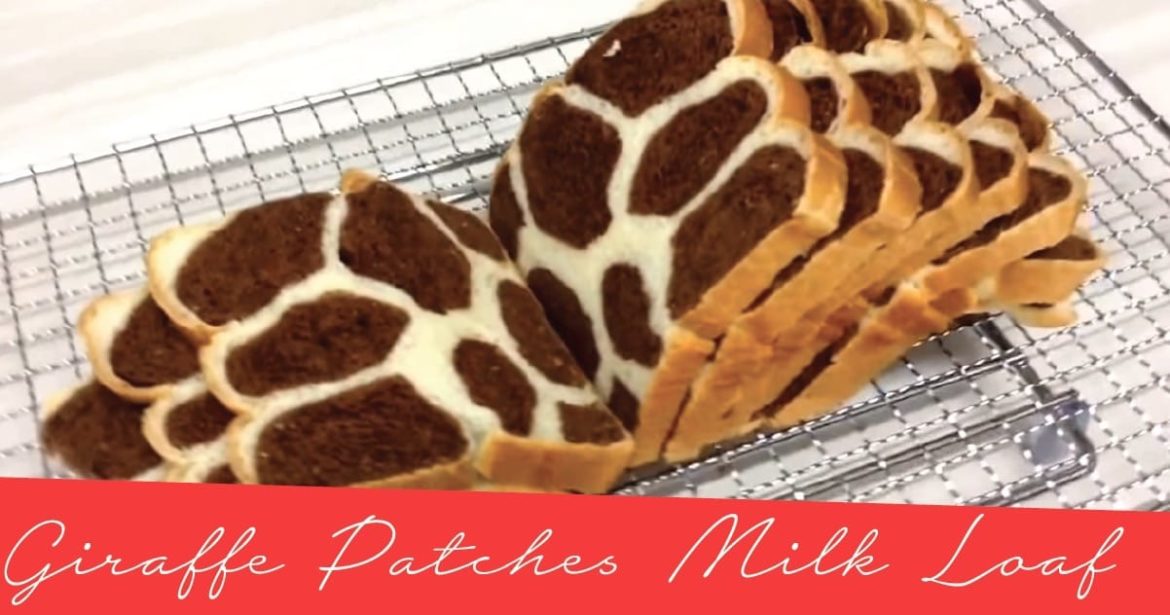
Giraffe Patches Milk Loaf

by PhilVie Story
Giraffe Patches Milk Loaf

There are a few methods of shaping this Giraffe printed loaf and I find by shaping it this way is the easiest…

Recipe adapted from nasi lemak lover.
Giraffe Patches Milk Loaf
Pin Print

Giraffe bread

Rating: 5.0/5
( 1 voted )
Serves: 4 Prep Time: Cooking Time: Nutrition facts: 200 calories 20 grams fat

Ingredients

  • 375gm bread flour
  • 35gm sugar
  • 1/2 tsp salt
  • 20gm soften unsalted butter
  • 1tsp yeast
  • 250gm warm milk

  • 20gm cocoa powder
  • 15gm milk

Instructions

  1. Mix 1tsp sugar (from the 35gm sugar), 250gm warm milk and yeast together to activate the yeast. Let it sit for 10mins/until foamy.
  2. In another bowl, add bread flour, salt, and sugar, stir to combine then add in yeast mixture… combine and knead into a dough.
  3. Keep kneading for 15-20mins until the pass membrane test. Then divide the dough into 2 portions - 1x230gm and balance.
  4. Let the 230gm plain dough sit and proof for 1hour.
  5. Add cocoa powder and milk into the balance dough and knead till combine. It will take a while but eventually, it will be mix in.. then let it sit and proof for 1 hour.
  6. After an hour, divide the plain dough into 4 portions. 1x71gm and 3x53gm (adjust the weight accordingly to the final weight of the plain dough)
  7. Divide cocoa dough into 4 portions as well. 1x138gm and 3x115gm (adjust the weight accordingly to the final weight of the cocoa dough)
  8. Flatten cocoa dough and roll it into oval shape then roll it into a log, set aside (for all the 4 portion dough)
  9. Flatten plain dough and roll it big enough to wrap around the cocoa dough. (for all the 4 portion dough)
  10. Then place cocoa dough on top of plain dough, wrap and seal the edge. Roll the dough to roughly 24cm long, then divide it into 2.
  11. In the end, you'll have 6 small dough and 2 big dough.
  12. In a slight grease Pullman tin, put 3 small dough into the Pullman tin, then stack 2 big dough on top of it, again stack 3 small dough on top. Adjust the dough to make sure it's stable…
  13. Let it rise for 1 hour, then bake at preheated 180c fan force for 30mins.
  14. Cover the loaf with an aluminum foil after 15mins of baking, to prevent further browning on the top.
  15. Let the loaf cool down on a rack then slice it up.
  16. There you'll have lovely giraffe patches.
Did You Make This Recipe?
Tag us on Instagram at @book.recipe.official.


Enjoy

Here’s the other printed loaf I made:


We call this kirin / kwangsoo loaf ^^.
Sorry for the video, as I’ve set stabilize mode while capturing the video, it seems to be following my hand movement hence the video is a bit dizzy. Also, I forgot to adjust the lighting properly

Related Recipes

Leave a Reply

[script_17]

This website uses cookies to improve your experience. We'll assume you're ok with this, but you can opt-out if you wish. Accept Read More

Delightful Mother’s Day Bites: Crostini with Balsamic Strawberries and Ricotta TRIPLE GINGERBREAD BUNDT CAKE Taro Cake Recipes STUFFED ZUCCHINI BLOSSOMS How to Make DATE SPICE CHOCOLATE CAKE