Camouflage Printed Loaf (Milk Loaf / Eggless)

by PhilVie Story
Camouflage Printed Loaf

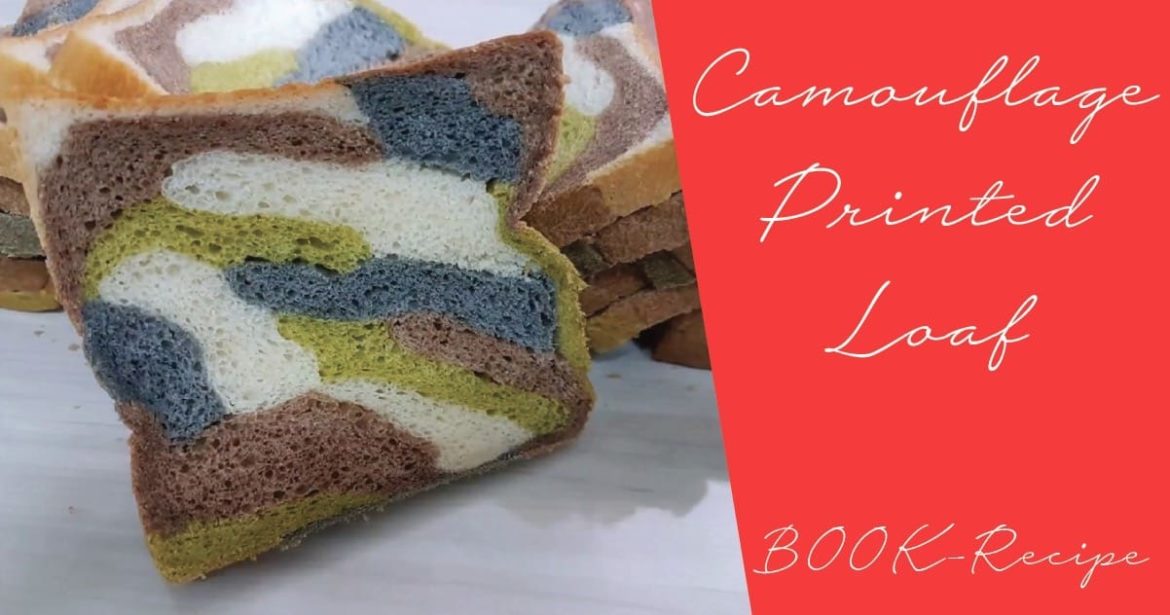
A subscriber requested camouflage printed loaf so here it is. It is actually very simple to do. All you need is 4 different shades of colors. I chose to use green, chocolate, black and white.

When stacking the dough make sure to make it as random and wavy as you can as we wouldn’t want a straight line dough.

You’ll get different design and shades as this design you can’t control it and you need to let it go as random as possible to get beautiful design.

I’m using the same recipe milk loaf for all my printed loaf. I find this dough very easy to work with as it is not sticky and easily roll to shape.
Camouflage Printed Loaf
Pin Print

Camouflage Printed Loaf

Rating: 5.0/5
( 1 voted )
Serves: 4 Prep Time: Cooking Time: Nutrition facts: 200 calories 20 grams fat

Ingredients

  • 375gm bread/hi protein flour
  • 1tsp instant yeast
  • 35gm sugar
  • 1/2tsp salt
  • 250ml milk
  • 20gm softened unsalted butter

  • Green tea paste - 1tsp green tea powder mix with 1tsp milk
  • Chocolate paste - 1tsp chocolate powder mix with 1tsp milk
  • Bamboo charcoal paste - 1/2tsp bamboo charcoal powder mix with 1/2 tsp milk

Instructions

  1. Mix everything together except unsalted butter, knead it to a rough dough then add in unsalted butter. Knead it for about 20mins using a stand mixer (breadmaker 2 rounds of dough function/hand kneading till pass window pane stage or stretchable and not sticky).
  2. Divide the dough into 4 portions (no need to be the exact portion). Cling wrap 1 plain dough and set aside to let it rise for 1hour.
  3. Knead in the rest of the paste (green tea/chocolate/bamboo charcoal) into each dough, then cling wrap and set aside to let it rise for 1hour.
  4. After 1hour remove the dough and divide each color dough into 4 portions so you'll end up with 16 doughs.
  5. Flatten and roll it to the length of your pan, then stack them up as randomly as possible, once done give it a roll to make sure there's no air pocket inside.
  6. Put the dough into a greased pan and let it rise till 90% before closing the cover and let it rise for another 15mins before baking it in a preheated 180c fan force oven for 30mins.
  7. Remove from the pan immediately after baking and let it cool down completely on a wire rack before slicing it.
Did You Make This Recipe?
Tag us on Instagram at @book.recipe.official.


Enjoy

Here’s the other printed loaf I made:

Related Recipes

Leave a Reply

[script_19]

This website uses cookies to improve your experience. We'll assume you're ok with this, but you can opt-out if you wish. Accept Read More

Delightful Mother’s Day Bites: Crostini with Balsamic Strawberries and Ricotta TRIPLE GINGERBREAD BUNDT CAKE Taro Cake Recipes STUFFED ZUCCHINI BLOSSOMS How to Make DATE SPICE CHOCOLATE CAKE